Choose Your Product Photography Gear
You’ve made the decision to take your own product photos. Now, you need to figure out what product photography gear you ought to use for your e-commerce website. If you’re new to photography, the options can be daunting and overwhelming. The prices, too. Especially when you start including lenses, lighting rigs, tripods, etc..
Thankfully, you found this blog and we’re going to walk you through a lot of this, give you some of our own personal recommendations, and show you what’s what with product photography gear on a budget.
While we can’t determine your budget for you, we encourage you to take the time to make this a worthwhile investment. Buying a new camera may seem like a big expense but consider that you may be able to cut your returns by up to 25%.
On to the gear!
Cameras
If you’ve gotten yourself a point-and-shoot in the last few years, have a friend with a DSLR, or have one of the most recent smartphones on the market, don’t feel like you need to run out and snag a brand new camera. You can definitely make do with one of those on a budget or for a quick turn-around.
DSLR
All that said, here at ShipStation, we’re currently using a Canon Rebel T3i for our photos and videos. This model is a few years older than current DSLRs but honestly, it gets the job done just as well. And as an older model, it comes a bit cheaper depending on where you find it.
So what should you look for out of a DSLR?
- RAW option: This is a setting on your camera that allows you to shoot RAW, or uncompressed, photos that offer you the best picture quality, higher bit depth and creative control. Most lower-priced DSLR cameras don’t shoot RAW, and only allow you to shoot photos as JPEGs, which don’t allow as much opportunity for editing, but will definitely do the job.
- Lens: Most DSLRs come with a “kit lens” that offers a focal length (size of lens and angle of view) of 18-50 mm or 18-55 mm. For the casual photographer, the kit lens offers a wide enough selection of focal lengths to cover family photos, some sport photos, and even some macro (close up) photography. What that means for you and your products as you begin this journey of product photography, is that it is possible to begin shooting your products with the camera body and the kit lens right out of the box. Upgrading your lens might offer you the best quick fix for better photos with your current DSLR.
- Aperture, shutter speed, exposure and white balance: These are all settings that your standard DSLR can adjust manually or automatically. When you take photos in RAW, you’ll be able to change these settings, some even after you take the actual picture. (This is one reason why we recommend going with a camera that has this RAW format setting.)
Above all, though, TEST your camera. Put it through its paces, play with its settings, and learn a bit about taking a well focused and staged photo. You don’t want your product photos to be the first time you try a new setting.
Smartphone Cameras
What if a DSLR is too much? If you can’t justify the expense, check your pocket. If you have a recent iPhone (SE, 6, 6S, 6S Plus, 7, 7 Plus), there’s a good chance you’ll be able to get the job done without buying a dedicated camera. In fact, with recent upgrades to iOS 10, there are some exciting new features that could be game changing.
What should I get for a smartphone rig?
- Camera apps that shoot RAW: You can now capture photos in RAW with your iPhone that offer the same benefits as a DSLR for uncompressed & edit-friendly photos. All you need to do is download the right app. Some apps you might try are: Manual, ProCamera, VSCO, and Adobe Lightroom.
- Lens kit: If you want to take your iPhone photography to the next level, you might look into getting a lens kit to get DSLR-like features such as zoom, wide-angle and fisheye, as well as an external flash. Some lens kit brands you could try are: Olloclip, Moment, ExoLens and Kamerar.
While we recommend capturing photos in RAW when possible, it’s worth noting that they will need to be processed in a raw converter or photo editing program like Adobe Lightroom before you can start editing the file–or use the file elsewhere. It’s also important to know that RAW files take up a large amount of space and camera power – so account for this when considering your SD card size/format or the storage on your phone.
Tripods
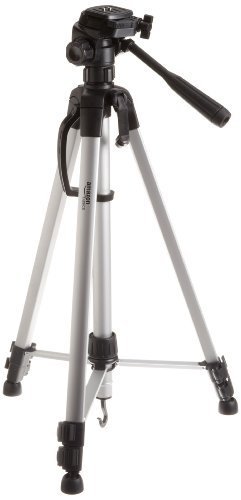
Unless you’re a surgeon—and frankly, even if you’re a surgeon—you need a tripod for stable, blur-free photos. You can adjust the height, tilt and swivel the camera, and of course, will keep the camera and your shot from shaking around (unless you’re on railroad tracks, in which case you’ll want to find a new shooting location).
Depending on what we’re up to, ShipStation utilizes two different tripods. For our feature videos, #TipTuesdays, and pre-recorded Talk Around Towns, we use the simple and cheap tripod on the right.
But if we’re shooting a live video for Facebook, Twitter, or Instagram, we use an adaptor with the tripod, specifically for mobile phones. You can check that out by clicking here.
Lighting
A well lit product means you’re giving your customers a clearer image of what exactly they’re buying (pun intended). Much like cameras, you can get nuts and buy pro-sumer (professional + consumer = pro-sumer) grade gear, or you can buy a cheaper kit or even a desk lamp.
When it comes to our own staff photos (not quite product photography, but shot similarly), we rely on two lights: the AlienBees B800 and AlienBees B400.
When space is a commodity, we’re also utilizing the LimoStudio 700W Lighting Kit, which will be used in several photos in upcoming blogs.
For the cheapest route, you can always find yourself a good, bright desk lamp! You can even make reflectors and softeners with a shoebox and baking paper–see the video below!
Backgrounds
Backgrounds are where you get creative and don’t have to actually spend money! Look around your office/house/room/garage. Do you have poster board? A big sheet of white paper? How about a shoe box or 3-ring binder? Parchment and/or wax paper?
If you answered yes to any of the above, you have your product photography background! Don’t believe me? Just check out this great video:
Make sure you check out how to choose where you shoot your photos, based off what type of photos you plan to take.