How to Create a Facebook Live Video for Your Business
In our previous posts, Why Your Business Should Use Facebook Live Videos and The Equipment You Need for Your Facebook Live Video, we reviewed the importance of your company using Facebook Live and inexpensive equipment you can use to make high-quality Facebook Live videos.
In this post, we’ll go over how to make a Facebook Live video for your business.
Please note that if you want to film a Facebook Live video on a mobile device, it has to be done through the Facebook app.
Thanks to my amazing intern, Erin McCusker, for volunteering her face and her feed in the screenshots!
Step 1: Login to Facebook
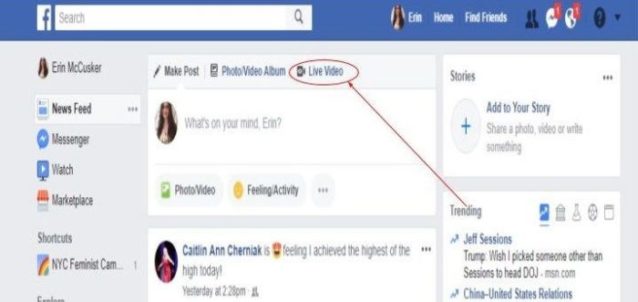
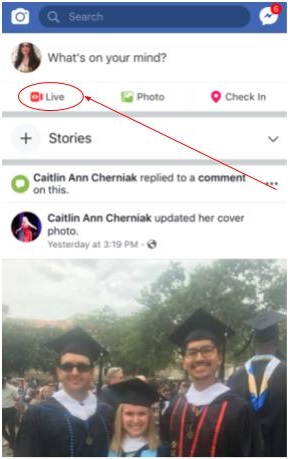
At the top of the News Feed should be the “What’s on your mind” section.
Desktop
On a desktop, the Live Video button will be directly above it.
Mobile
If you are on mobile, then this button will be right below it.
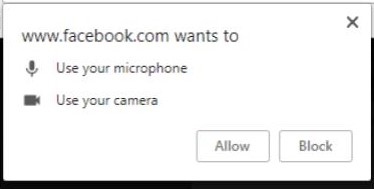
Step 2: Give Facebook Permission to Access Your Microphone and Camera
If this is your first time creating a Facebook Live video for your business, then Facebook will ask for permission to access your microphone and camera. Press Allow.
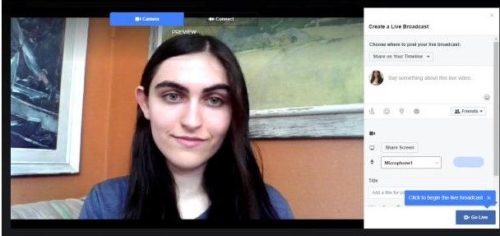
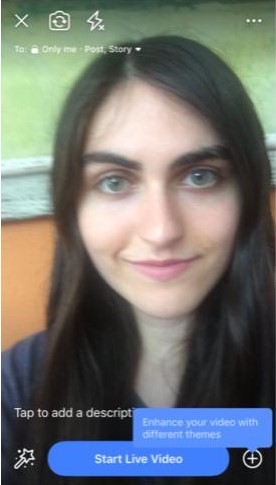
Step 3: Check Video Quality
You should now see yourself, or whatever the chosen filmed subject matter is, on screen. This is a good opportunity to make sure the background, lighting, and any other visuals are to your satisfaction. Make sure that you can clearly see yourself on the screen.
Desktop
Mobile
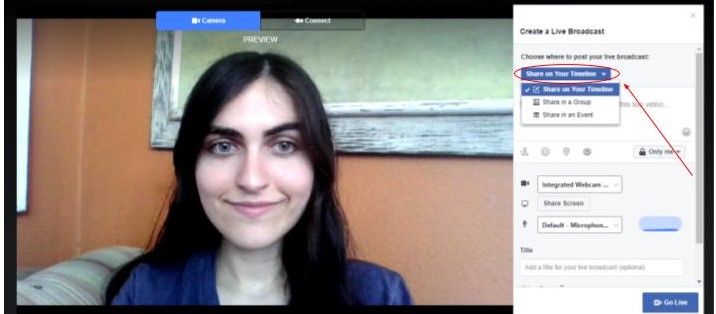
Step 4: Pick Your Settings
There are several settings to choose before going live.
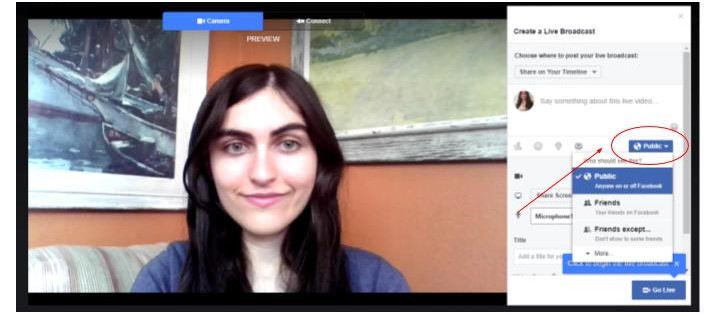
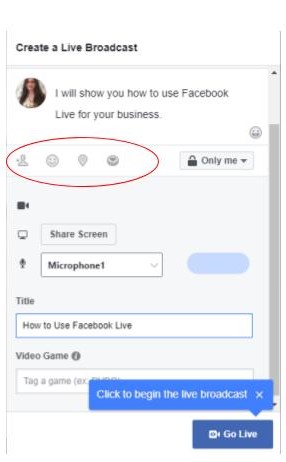
Desktop
If you’re on a computer, choose where you would like to post your live video. Facebook gives you three options: share to your timeline, share in a group, or share in an event.
Most of the time you will likely share to your timeline because this will go directly to your company page and gain the most visibility on the newsfeed. However, sometimes you might want to create content that is specific to an event or for a group.
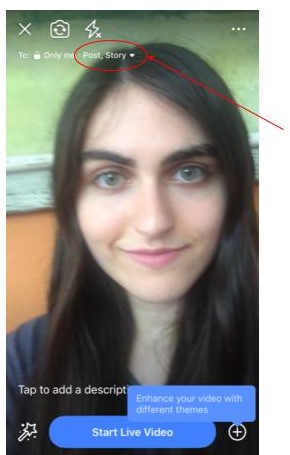
Mobile
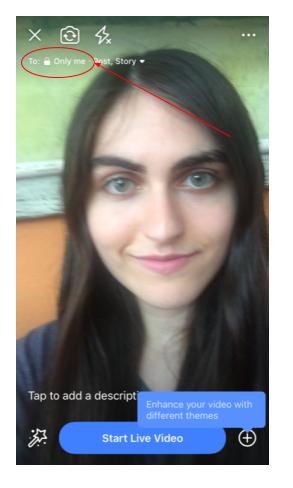
If you are on mobile, your two options are to publish the video as a Post and/or a Story. If you select Story, then it will be saved in the Story section and disappear after 24 hours, similar to Instagram and Snapchat stories. At the top left of the screen, tap Post, Story.
It should then take you to this screen.
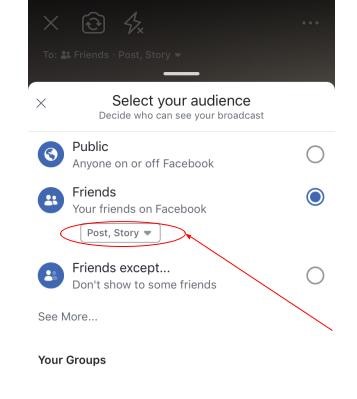
Tap Post, Story again.
Make sure Post is checked if you want the Facebook Live video to be posted on the News Feed and not disappear after 24 hours. If you only want the video posted as a Story, then uncheck it.
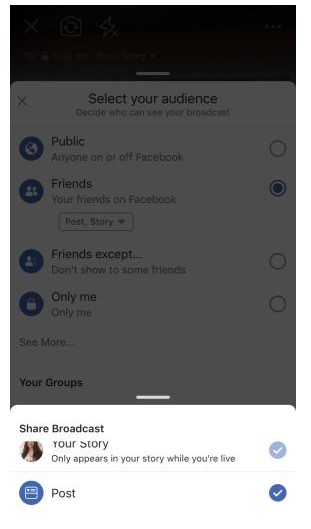
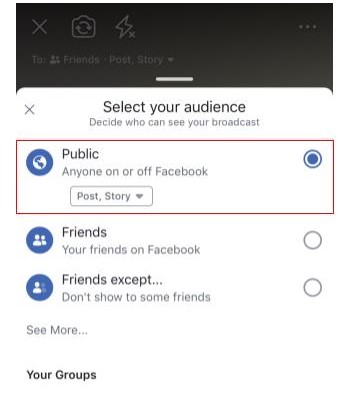
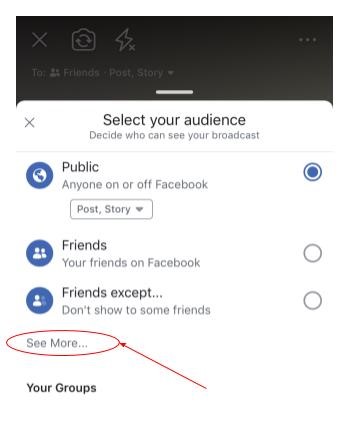
Step 5: Select Your Audience
Next, choose who can view your video. This button is right below the video description box.
If you want the Facebook Live video for your business to gain a lot of views, select public. Some other options are allowing only Facebook Friends to watch your live video or Friends Except…, where you can exclude certain followers from seeing your live stream.
Desktop
Mobile
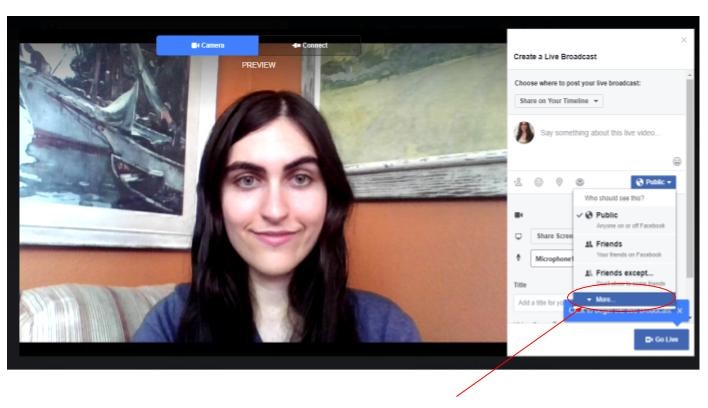
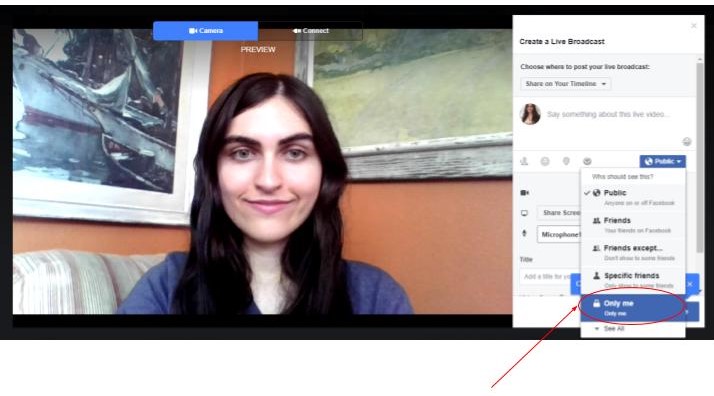
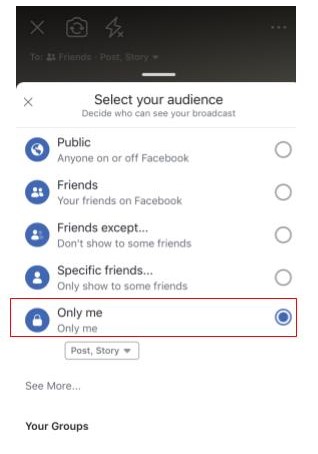
Step 6: Do a Practice Run (Optional)
If you want to just do a test to practice using the platform you can also select Only Me. With this option, only the owner of the Facebook account will be able to watch the video, unless he or she changes the setting later.
After recording the video, you can watch it to get ideas of what to do differently for your public live streams and then delete it at any time.
Desktop
To set the visibility to Only Me, click on more and then click Only Me.
Mobile
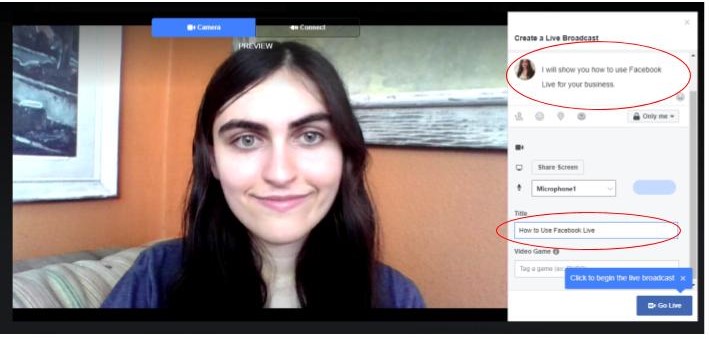
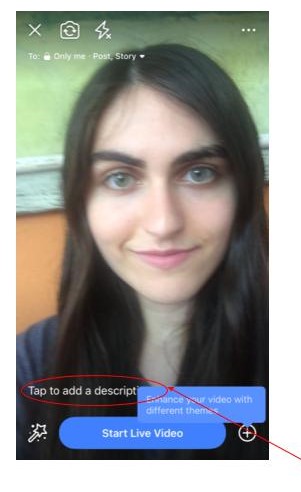
Step 7: Give Your Video a Name and Description
This next step is important in getting people to view your video. Type in a title and description of your video. Make sure the title and description gives an accurate idea of what your Facebook Live video is about but also grabs people’s attention.
If you are planning on giving out promo codes in your livestream, the description could be a good place to include this. If you have a weekly series, remind people of when the next livestream will be in your description as well.
Desktop
Mobile
For mobile, there aren’t separate boxes for the title and description. Tap the bottom part of the screen where it says Tap to add a video description and then type in what you would like to say.
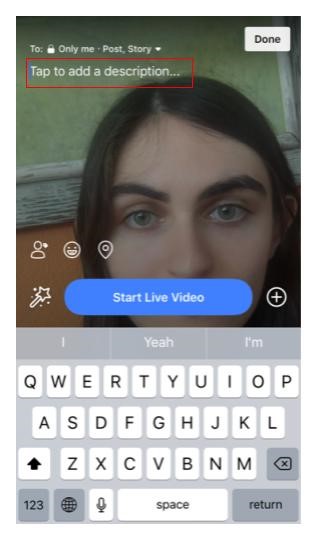
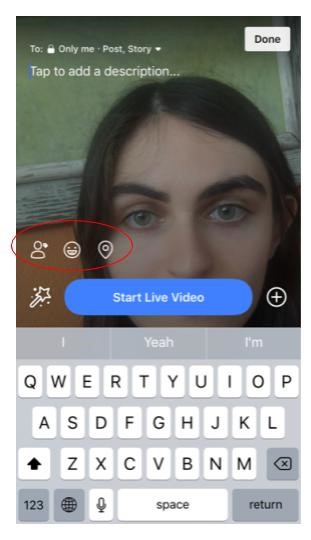
Step 8: Add Buttons (Optional)
There are some additional buttons you may also want to use before going live depending on your company’s tone and the purpose of the video.

Tag button.
Use this to tag people in your Facebook Live video.

Feeling/activity button.
Put how you are feeling, what you are doing, etc.

Check in button.
Add the location of where you are livestreaming from.
This can help increase visibility, especially if the Facebook Live video
is being filmed at a popular event or location.

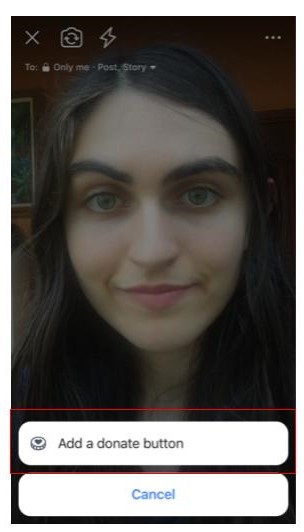
Donate button.
Viewers can donate to the charity you select during or after the live video
by pressing the donate button.
People will also be able to view how much money has been raised via the video.
Desktop
On a computer, these options are right below the description box.
Mobile
If you are on mobile, you will see these buttons when you press Tap to add a description.
The add a donate button can be found by tapping the 3 dots in the top right corner.
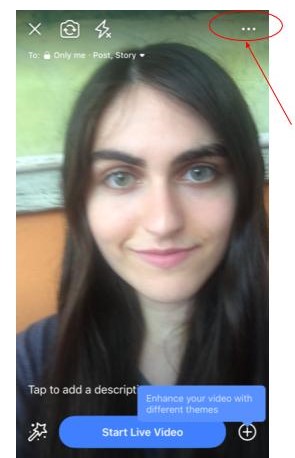
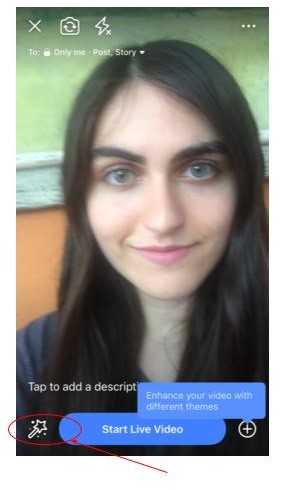
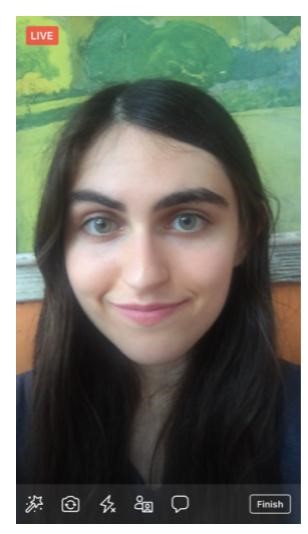
Step 9: Add Filters (Optional)
If you are filming on mobile, there are extra bells and whistles available, such as filters, brightness, etc. Please note that just because these options are available doesn’t mean it makes sense for your company to use them.
If your video is about a serious subject matter or your company has a more professional tone, then it wouldn’t make sense to add a silly filter to a Facebook Live video for your business.
By pressing the wand icon, you can add filters, drawings, text, etc.
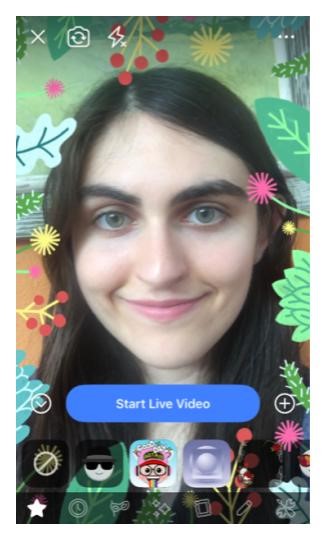
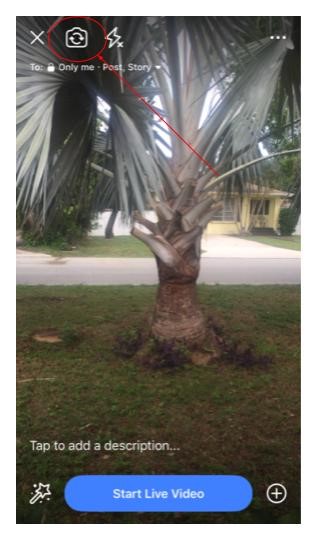
From there, if you tap the settings logo on the far right, you can change brightness or flip the image horizontally or vertically.
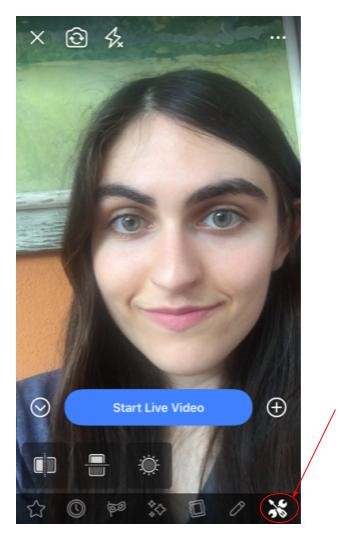
If you press the camera icon in the top left-hand corner you can reverse the camera view to selfie or vice versa.
Step 10: Go Live
Once you have filled everything out and the video and audio quality is to your satisfaction, you are ready to go live.
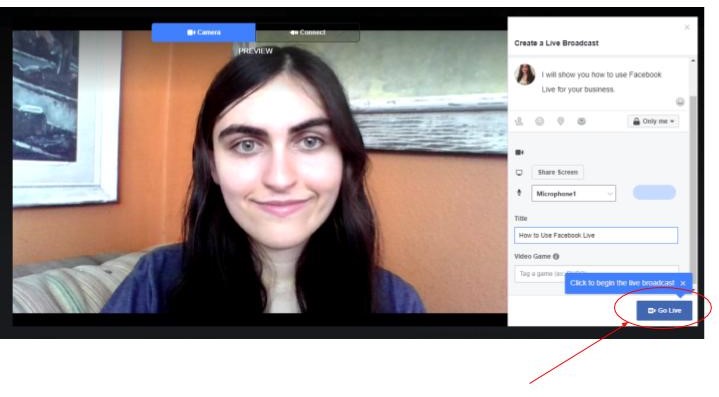
Desktop
If you are on a computer, press the Go Live button in the bottom right-hand corner.
If you are filming on a computer, the top left-hand corner will tell you how long you have been live. Facebook Live videos can’t go over four hours and your video will automatically end if it exceeds this limit.
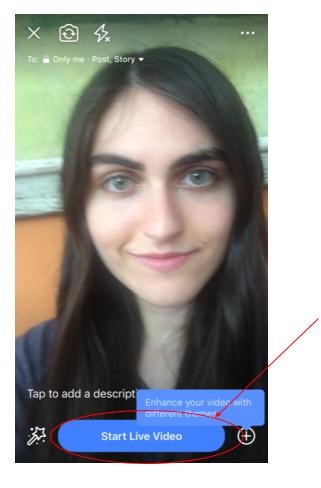
Mobile
If you are on mobile, press the Start Live Video on the bottom of the screen.
Step 11: Interact with Your Audience
You may not be in the same room as your audience, but that doesn’t mean you shouldn’t engage with them.
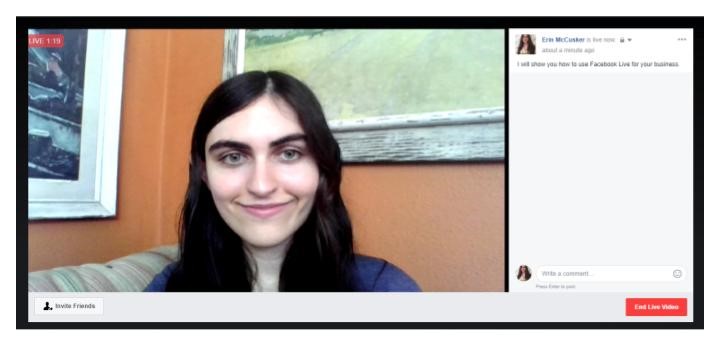
Desktop
On the right side of the screen, you will be able to see people’s comments and type your own comments and replies. Comments appear on the feed in reverse chronological order.
It is a good idea to answer viewers questions, respond to complaints, and thank them for praise in the comment section.
Mobile
On mobile, comments appear at the bottom of the screen.
You may also want to directly respond to viewers in your Facebook Live video. For instance, in a Q&A video, you would address the individual by her or his username and read out the question before answering.
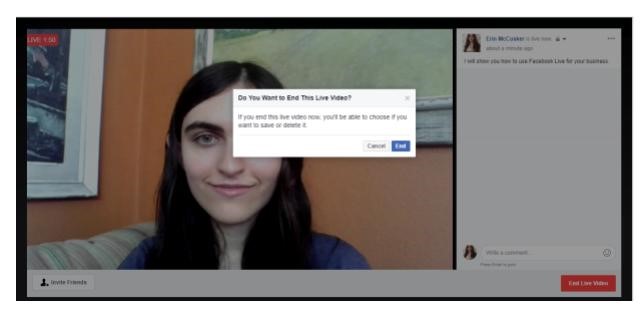
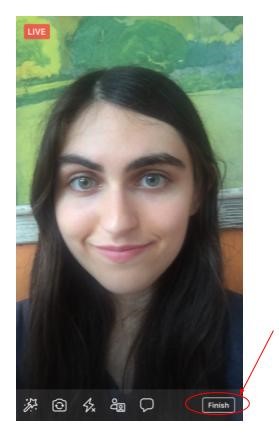
Step 12: End the Broadcast
Once you are ready to end your live video, if you are on a computer, click the red End Live Video button in the bottom right-hand corner.

A box will then pop up asking if you want to end the video. Press End.
If you are on mobile, end the video by pressing Finish in the bottom right-hand corner.
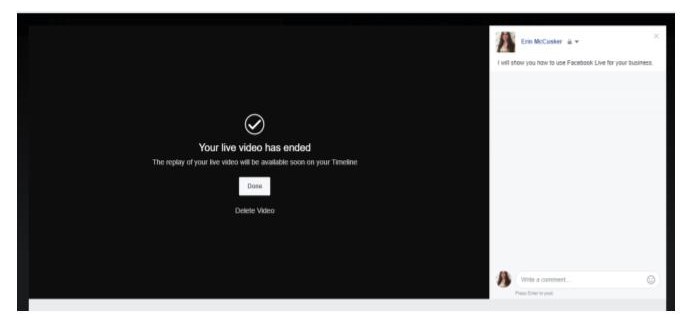
Step 13: Save or Delete the Video
It gives you the option to either save or delete your video. If you save your video, people that didn’t get to see the video live will be able to go back and watch it later. You will still have the option to delete the video later if you press save.
Desktop
This is what the screen should look like after you end your live stream.
Mobile
On mobile, in addition to saving, deleting, or sharing your video, you have the option to post your video on your timeline and/or your story. You can also choose who is able to view your video.
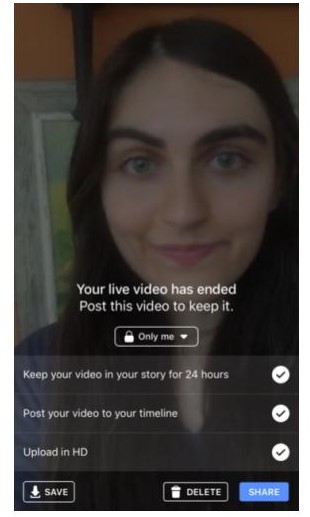
If you chose the Only Me option to practice, go to your timeline to watch the video to assess what works and what you should do differently for future live streams. You can also change who can view your video on this page.
Moving Forward
That’s it! You now have all the steps necessary for making a great Facebook Live video for your business! We’ll give you examples and great ideas for different types of Facebook Live videos in our next post.